I feel fortunate to have experienced a completely different way of life in Italy. I was a child in the late 1960s, when many Umbrian villagers still didn’t have home ovens and took their bread to the bakery for cooking. Easter was an especially busy time, with women preparing Torta di Pasqua, a leavened cheese bread shaped like a squat panettone and traditionally served for Easter breakfast.
My own dough-making grandmother Maria, required two or three strong people to knead the dough she’d assembled over two days. Rich in eggs, cheese and butter (or lard), the breads rose slowly in their terracotta molds. I loved baking day. We had to pack the breads on a wooden board and cover them with thick towels to make sure they didn’t cool and deflate. Then we walked to the bakery, where we’d booked a time slot for the cooking.
By Saturday, everything was finished (to everyone’s relief). We’d pack a Torta di Pasqua, a salami, a thick slab of chocolate, a bottle of sweet wine and a few hard-boiled eggs and take them all to the local church for a blessing so that we could have a proper Easter breakfast the next day. The Easter breakfast tradition is still honored in many Umbrian homes even though not everyone makes the torta, which is now available in the supermarkets all year’s long. The commercial version however is a pale imitation of the real thing.
This wonderful, rich cheese bread must be started the night before it is baked. Please note that it tastes best a few hours after baking. Young pecorino might be difficult to find, in which case substitute Emmentaler, young provolone or another mild cheese. Also note that pre-grated cheeses have additives to prevent clumping that might affect rising or oven spring.
For this recipe I use a 1.2 liter (4 cups) loaf pan or an 18 cm (7 inches) diameter round cake pan that must be at least 12 cm (5 inches) tall. If you have a choice, please use deep narrow pans in preference to wide shallow ones.
Enriched breads require more steps in preparation, as fats or sugar might prevent fermentation if added too early in the process.
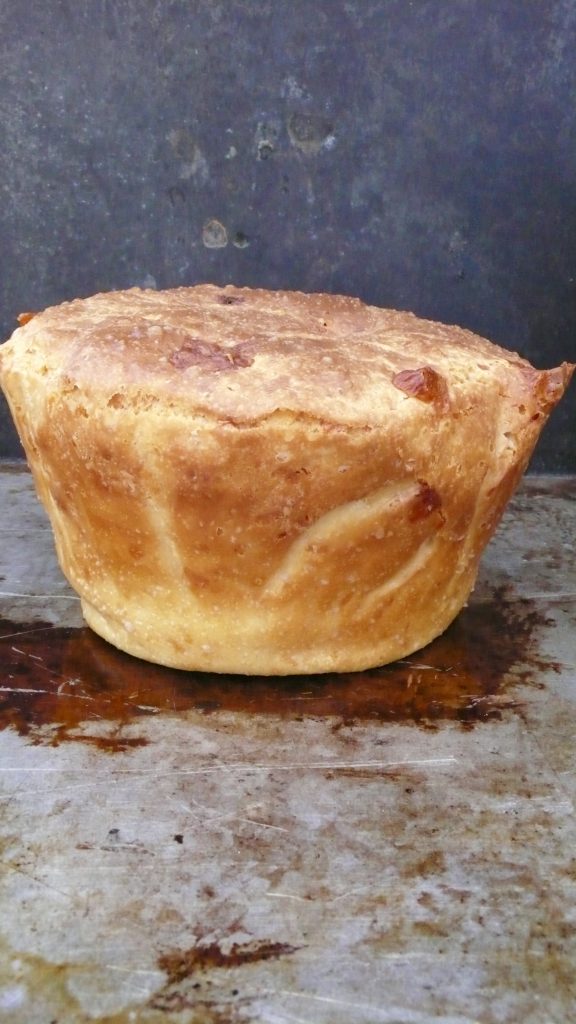
Torta di Pasqua is served at breakfast on Easter morning. Photo: Letizia Mattiacci
Preparation
Day 1. Evening
Make a bread dough starter using half of the flour, 1/4 teaspoon of yeast and 1/2 to 2/3 of the milk. Different flours will absorb different amounts of liquid. The starter should make a firm and smooth ball, so adjust with more or less milk (by the tablespoon) and knead until you reach the desired consistency.
Please note that you will be adding 3 eggs in the next step, so the starter needs to be firm (but not dry) to prevent a runny final dough.
Coat the dough in 1-2 teaspoons of olive oil, cover with a lid or plastic wrap and place in a draft-free area overnight.
Day 2. Morning
Bring all remaining ingredients to room temperature. Crack open the eggs in a bowl, add the rest of the flour, olive oil, salt, grated cheese, softened butter and 1/2 teaspoon of yeast. Stir well each time you add an ingredient, then add the starter. Keep mixing until all the ingredients are thoroughly incorporated.
The dough should be well-hydrated, so a stand mixer definitely helps as this is quite a sticky dough. If it looks dry, add some milk, a tablespoon at the time.
Finally, add the diced cheese and stir to distribute it through the mixture. Transfer into a well-buttered mold, taking care not to fill it more than half-way. You can also line the mold with parchment paper.
Cover and place in a draft-free environment until the dough fills the mold, 2-4 hours.
Poke test
To assess if the bread is ready to bake, press an oiled finger into the dough. If it’s elastic and the mark of your finger disappears, it hasn’t fermented long enough. If your finger leaves an indent that stays unchanged, the bread is over-proofed. Ideally, the mark of your finger should not remain in the dough, but spring back partially and leave a shallow indent.
In winter, you might place the dough in a switched off oven with the light on to keep it warm and encourage fermentation.
Pre-heating, steaming and baking
Pre-heat the oven at 200°C (390°F). Once it has reached the temperature, place a pan full of boiling water in the bottom of the oven. Place the mold with the dough inside the oven, and using a spray bottle, quickly spray towards the left and right sides of the oven.
Close the oven door to trap the steam inside and bake for 15 minutes. Remove the pan with water and continue baking for about 45 minutes until the bread is golden brown and the internal temperature measures 98-99°C (209-210°F).
Once cooked, let the torta rest a little and wait until it has retreated from the edges of the mold before place on a cooling rack.
Slice only when completely at room temperature. It will taste best after a few hours and pairs beautifully with red wine and salami, but also with soups and green salads or steamed greens.
Letizia Mattiacci is a cookbook author and owner of Alla Madonna del Piatto Cooking School and Agriturismo in Assisi, Umbria, https://incampagna.com. This recipe has been previously published in Mrs. Mattiacci cookbook entitled “Festa Italiana.”
Mi sento fortunata ad aver sperimentato un modo di vivere completamente diverso in Italia. Ero una bambina alla fine degli anni ’60, quando molti abitanti dei villaggi umbri non avevano ancora il forno in casa e portavano il pane al forno per cuocerlo. La Pasqua era un periodo particolarmente impegnativo, con le donne che preparavano la Torta di Pasqua, un pane al formaggio lievitato a forma di panettone tozzo e tradizionalmente servito per la colazione di Pasqua.
Mia nonna Maria, che preparava la pasta, aveva bisogno di due o tre persone forti per impastare la pasta che aveva assemblato per due giorni. Ricchi di uova, formaggio e burro (o strutto), i pani salivano lentamente nei loro stampi di terracotta. Adoravo il giorno della cottura. Dovevamo imballare i pani su una tavola di legno e coprirli con asciugamani spessi per assicurarci che non si raffreddassero e sgonfiassero. Poi andavamo a piedi al panificio, dove avevamo prenotato una fascia oraria per la cottura.
Per il sabato, tutto era finito (con sollievo di tutti). Impacchettavamo una Torta di Pasqua, un salame, una spessa lastra di cioccolato, una bottiglia di vino dolce e alcune uova sode e portavamo tutto alla chiesa locale per una benedizione in modo da poter fare una vera colazione di Pasqua il giorno dopo. La tradizione della colazione pasquale è ancora onorata in molte case umbre anche se non tutti fanno la torta, che ormai è disponibile nei supermercati tutto l’anno. La versione commerciale però è una pallida imitazione di quella vera.
Questo meraviglioso e ricco pane al formaggio deve essere iniziato la sera prima della cottura. Si prega di notare che ha un sapore migliore qualche ora dopo la cottura. Il pecorino giovane potrebbe essere difficile da trovare, in tal caso sostituite con Emmentaler, provolone giovane o un altro formaggio dolce. Notate anche che i formaggi pre-grattugiati hanno additivi per prevenire la formazione di grumi che potrebbero influenzare la lievitazione o la crescita in forno.
Ingredienti
– 250 g di farina universale (contenuto proteico 11 1/2- 12%), divisa
– 100 g di formaggio grattugiato (1/2 parmigiano, 1/2 pecorino stagionato)
– 60 g di pecorino giovane tagliato a piccoli dadi
– 3 uova
– 30 g di burro ammorbidito o strutto
– 2 cucchiai di olio d’oliva
– 125 ml di latte (1/2 tazza), diviso
– 1 cucchiaino di sale
– 3 g (3/4 cucchiaino) di lievito secco attivo, diviso
Per questa ricetta uso una teglia da 1,2 litri (4 tazze) o una teglia rotonda da 18 cm (7 pollici) di diametro che deve essere alta almeno 12 cm (5 pollici). Se potete scegliere, usate teglie strette e profonde invece di quelle larghe e poco profonde.
I pani arricchiti richiedono più fasi di preparazione, poiché i grassi o lo zucchero potrebbero impedire la fermentazione se aggiunti troppo presto nel processo.
Preparazione
Giorno 1. Sera
– Preparare uno starter per la pasta di pane usando metà della farina, 1/4 di cucchiaino di lievito e da 1/2 a 2/3 del latte. Farine diverse assorbiranno diverse quantità di liquido. Lo starter dovrebbe formare una palla soda e liscia, quindi regolatevi con più o meno latte (a cucchiaio) e impastate fino a raggiungere la consistenza desiderata.
– Si prega di notare che si aggiungeranno 3 uova nella fase successiva, quindi lo starter deve essere sodo (ma non asciutto) per evitare che l’impasto finale sia troppo liquido.
– Spalmate l’impasto con 1-2 cucchiaini di olio d’oliva, coprite con un coperchio o una pellicola di plastica e mettete in una zona senza correnti d’aria per tutta la notte.
Giorno 2. Mattina
– Portare tutti gli ingredienti rimanenti a temperatura ambiente. Rompere le uova in una ciotola, aggiungere il resto della farina, l’olio d’oliva, il sale, il formaggio grattugiato, il burro ammorbidito e 1/2 cucchiaino di lievito. Mescolare bene ogni volta che si aggiunge un ingrediente, poi aggiungere lo starter. Continuate a mescolare fino a quando tutti gli ingredienti sono completamente incorporati.
– L’impasto deve essere ben idratato, quindi un’impastatrice aiuta sicuramente perché questo è un impasto piuttosto appiccicoso. Se sembra asciutto, aggiungete un po’ di latte, un cucchiaio alla volta.
– Infine, aggiungete il formaggio a cubetti e mescolate per distribuirlo nell’impasto. Trasferire in uno stampo ben imburrato, facendo attenzione a non riempirlo più di metà. Potete anche foderare lo stampo con carta da forno.
– Coprire e mettere in un ambiente senza correnti d’aria fino a quando l’impasto riempie lo stampo, 2-4 ore.
Test della punzecchiatura
Per valutare se il pane è pronto per la cottura, premete un dito oliato nell’impasto. Se è elastico e il segno del dito scompare, non ha fermentato abbastanza a lungo. Se il dito lascia un’impronta che rimane invariata, il pane ha aspettato troppo. Idealmente, il segno del dito non dovrebbe rimanere nell’impasto, ma tornare parzialmente indietro e lasciare una tacca poco profonda.
In inverno, potreste dover mettere l’impasto in un forno spento con la luce accesa per tenerlo al caldo e favorire la lievitazione.
Preriscaldamento, cottura a vapore e cottura
– Preriscaldare il forno a 200°C (390°F). Una volta raggiunta la temperatura, mettere una pentola piena di acqua bollente sul fondo del forno. Posizionare lo stampo con l’impasto all’interno del forno e, utilizzando una bottiglia spray, spruzzare rapidamente verso i lati sinistro e destro del forno.
– Chiudere la porta del forno per intrappolare il vapore all’interno e cuocere per 15 minuti. Rimuovere la teglia con l’acqua e continuare la cottura per circa 45 minuti fino a quando il pane è dorato e la temperatura interna misura 98-99°C (209-210°F).
– Una volta cotta, lasciare riposare un po’ la torta e aspettare che si sia ritirata dai bordi dello stampo prima di metterla su una griglia di raffreddamento.
– Affettare solo quando è completamente a temperatura ambiente. Il suo sapore sarà migliore dopo qualche ora e si abbina magnificamente con vino rosso e salumi, ma anche con zuppe e insalate verdi o verdure al vapore.
Letizia Mattiacci è autrice di libri di cucina e proprietaria della Scuola di Cucina e Agriturismo Alla Madonna del Piatto ad Assisi, Umbria, https://incampagna.com. Questa ricetta è stata precedentemente pubblicata nel libro di cucina di Mattiacci intitolato “Festa Italiana”.
Unlike many news organizations, instead of putting up a paywall we have eliminated it – we want to keep our coverage of all things Italian as open as we can for anyone to read and most importantly share our love with you about the Bel Paese. Every contribution we receive from readers like you, big or small, goes directly into funding our mission.
If you’re able to, please support L’Italo Americano today from as little as $1.
")