In medieval mythology there is a land named Cockaigne (Cuccagna in Italian), which is an imaginary place of pleasure and plenty where the harshness of peasant life does not exist. In Cuccagna, the mountains are made of gold, silver or cheese, lakes are filled with milk and honey and candied fruit rains from the sky.
Throughout the centuries, the status of candied fruit as the food of dreams is unchanged.To this day, the brilliant preserved fruit is still an essential ingredient for panettone, cassata, cannoli, pastiera, panforte, panpepato and a myriad of other wonderful treats belonging to our culinary tradition.
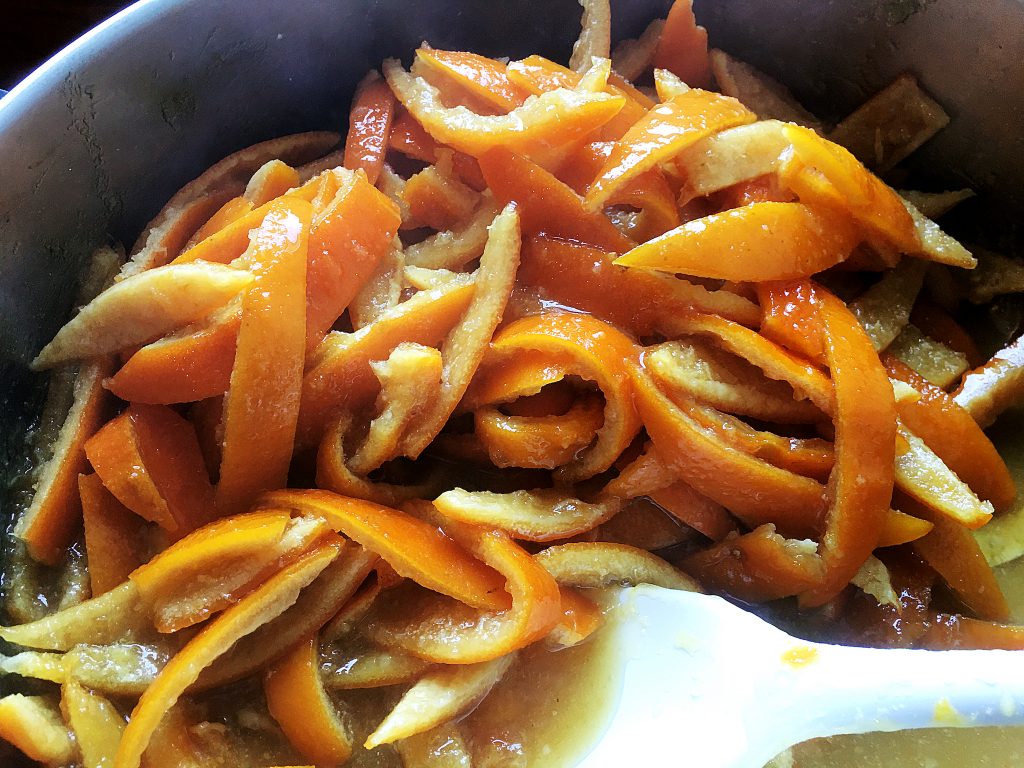
Preparing the orange peel. Photo courtesy of Letizia Mattiacci
However, I am sure that some of you might have found yourself picking out the candied fruit from a slice of panettone or other fruitcake. I did when I was young; then I just avoided fruitcakes altogether. I remember wondering why anyone would ruin a cake with all those plasticky orange and green bits? What went wrong? The market is flooded with cheaply made sweets studded with candied fruit that has no resemblance to the luxury food of the past and is most often than not full of artificial flavors and coloring.
Several years ago, I happened to have too many oranges, too much marmalade, and more than enough arancello (orange liqueur), so I decided to be adventurous and investigate how to make candied orange peel. I was not convinced I would love it, but I planned to use it as decoration for panna cotta and other desserts. Luckily, I was in for a surprise: I could not believe my taste buds, but homemade candied fruit is heaven!
Candied orange with ricotta. Photo courtesy of Letizia Mattiacci
Proper candied fruit is indeed addictive – fragrant, intense and not plasticky as the cheap supermarket variety. It imparts wonderful citrus nuances to any cake, cookies, or sweet breads. I also dice it into special salads. After this revelation, I began to make candied orange peel every January, as a special ingredient and for edible gifts. They keep for the whole year.
We can’t grow oranges or lemons in Umbria, so every winter I order a crate of organic oranges from Sicily and use them to make preserves for the whole year. I experimented with various recipes for candied orange peel but was always unhappy with the convoluted methods and leathery results until a few years ago when a kind friend gave me this easy recipe, taken from an old magazine. If you make the candied peel before Christmas you can package it up into pretty jars and give them as fabulously delicious gifts.
Ingredients
• 2.5 kg (5 lb, approx. 12 oranges) organic, unwaxed oranges with a thick skin, for example Washington Navel oranges
• 1.8 kg (8 cups) sugar
Procedure
Halve and juice the oranges. Keep the juice for some other use. Place the peels in a large pan and cover with cold water. Bring to the boil, cook for 3 minutes and then drain.
Return the peels to the pan, and cover with cold water. Bring to the boil, cook for 3 minutes and then drain. Repeat for a third time. Leave the peels in a colander until they are cool enough to handle.
Using a metal spoon, scrape out the soft membranes and discard. Cut the peels into 1/2 inch(1 cm) wide strips and set aside.
In a large shallow pan set over a high heat, bring 2 lt (8 cups) of water and 1.35 kg (6 cups) sugar to the boil. Add the peels, reduce the heat to maintain a gentle simmer, and cook, stirring occasionally until the peels become tender and translucent. This will take 1 1/2 to 3 hours, depending on the thickness of the peels. Do not let the sugar turn brown or caramelize.
Using a slotted spoon, drain the peels and spread them out on
a large tray lined with parchment paper. Once they are at room temperature, toss them in a cup of sugar. Allow them to dry for a day.
The next day the peels should be soft but dry. If they are still sticky, toss them with some more sugar (1/2 to 1 cup) and let them dry for one or two more days. By this time, the peel should still be soft and can be packed for gifts.
The peels will last for about a month but be aware that because they are not treated with artificial preservatives, mould may eventually grow on them.
To preserve the peels for cooking, leave them on the tray for several more days until they are completely dry. Transfer to a box, cover loosely with kitchen paper and keep in a dry cupboard, where they will last for up to a year.
Letizia Mattiacci is a cookbook author and owner of Alla Madonna del Piatto Cooking School and Agriturismo in Assisi, Umbria, https://incampagna.com This recipe has been previously published in Mrs. Mattiacci cookbook entitled “A Kitchen with a View.”
Nella mitologia medievale c’è una terra chiamata Cockaigne (Cuccagna in italiano), che è un luogo immaginario di piacere e abbondanza dove la fatica della vita contadina non esiste. Nella terra della Cuccagna, le montagne sono di oro, argento o formaggio, i laghi sono pieni di latte e miele e la frutta candita piove dal cielo.
Nel corso dei secoli, lo status della frutta candita quale cibo dei sogni è rimasto immutato; ancora oggi, la brillante frutta conservata è un ingrediente essenziale per panettoni, cassate, cannoli, pastiera, panforte, panpepato e una miriade di altre meravigliose delizie appartenenti alla nostra tradizione culinaria.
Tuttavia, sono sicura che alcuni di voi si sono trovati a togliere i canditi da una fetta di panettone o da un altro dolce alla frutta. L’ho fatto anch’io da giovane, poi ho evitato del tutto i dolci alla frutta. Ricordo che mi chiedevo perché qualcuno dovesse mai rovinare una torta con tutti quei pezzi arancioni e verdi simili alla plastica. Cosa non andava bene? Il mercato è inondato di dolci a buon mercato costellati di frutta candita che non ha alcuna somiglianza con il cibo di lusso del passato e il più delle volte è piena di aromi e coloranti artificiali.
Diversi anni fa, mi è capitato di avere troppe arance, troppa marmellata, e fin troppo arancello (liquore all’arancia), così ho deciso di avventurarmi e provare a fare la buccia d’arancia candita. Non pensavo che mi sarebbe piaciuta, ma avevo intenzione di usarla come decorazione per la panna cotta e altri dolci. Per fortuna, mi aspettava una sorpresa: non potevo credere alle mie papille gustative, ma la frutta candita fatta in casa è il paradiso!
La vera frutta candita è davvero buona – fragrante, intensa e non plasticosa come la varietà economica da supermercato. Conferisce meravigliose sfumature agrumate a qualsiasi torta, biscotto o pane dolce. La taglio anche a dadini dentro insalate speciali. Dopo questa rivelazione, ho iniziato a fare scorze d’arancia candite ogni gennaio, come ingrediente speciale e per regali commestibili. Si conservano per tutto l’anno.
Non possiamo coltivare arance o limoni in Umbria, così ogni inverno ordino una cassa di arance biologiche dalla Sicilia e le uso per fare conserve per tutto l’anno. Ho sperimentato varie ricette per le scorze d’arancia candite ma ero sempre insoddisfatta dei metodi complicati e dei risultati coriacei fino a quando, qualche anno fa, una cara amica mi ha dato questa facile ricetta, presa da una vecchia rivista. Se fate le scorze candite prima di Natale, potete confezionarle in graziosi vasetti e regalarle come un dono incredibilmente buono.
Ingredienti
– 2,5 kg (5 lb, circa 12 arance) di arance biologiche non cerate con buccia spessa, per esempio le arance Washington Navel
– 1,8 kg (8 tazze) di zucchero
Procedura
Tagliare in due e spremere le arance. Conservare il succo per qualche altro uso. Mettere le bucce in una grande pentola e coprire con acqua fredda. Portare a ebollizione, cuocere per 3 minuti e poi scolare.
Rimettere le bucce nella pentola e coprire con acqua fredda. Portare a ebollizione, cuocere per 3 minuti e poi scolare. Ripetere per una terza volta. Lasciare le bucce in un colino fino a quando non sono abbastanza fredde da poterle maneggiare.
Usando un cucchiaio di metallo, raschiare le membrane morbide e scartarle. Tagliare le bucce in strisce larghe 1/2 pollice (1 cm) e mettere da parte.
In una grande padella poco profonda posta su un fuoco alto, portare ad ebollizione 2 lt (8 tazze) di acqua e 1,35 kg (6 tazze) di zucchero. Aggiungere le bucce, ridurre il calore per mantenere una leggera ebollizione e cuocere, mescolando di tanto in tanto, fino a quando le bucce diventano tenere e traslucide. Questo richiederà da 1 ora e 1/2 a 3 ore, a seconda dello spessore delle bucce. Non lasciare che lo zucchero diventi marrone o si caramellizzi.
Usando un cucchiaio forato, scolare le bucce e distribuirle su un grande vassoio rivestito di carta da forno. Una volta che sono a temperatura ambiente, gettarle in una tazza di zucchero. Lasciarle asciugare per un giorno.
Il giorno dopo, le bucce dovrebbero essere morbide ma asciutte. Se sono ancora appiccicose, gettatele in altro zucchero (da 1/2 a 1 tazza) e lasciatele asciugare per uno o due giorni ancora. A questo punto, le bucce dovrebbero essere ancora morbide e possono essere confezionate per i regali.
Le bucce dureranno per circa un mese, ma sappiate che poiché non sono trattate con conservanti artificiali, la muffa può crescere su di esse.
Per conservare le bucce per la cottura, lasciatele sul vassoio ancora per diversi giorni fino a quando non saranno completamente asciutte. Mettetele in una scatola, copritele delicatamente con carta da cucina e conservatele in una credenza asciutta, dove dureranno fino a un anno.
Letizia Mattiacci è autrice di libri di cucina e proprietaria della Scuola di Cucina e dell’Agriturismo Alla Madonna del Piatto ad Assisi, Umbria, https://incampagna.com. Questa ricetta è stata già pubblicata nel libro di cucina di Mattiacci intitolato “Una cucina con vista”.
Unlike many news organizations, instead of putting up a paywall we have eliminated it – we want to keep our coverage of all things Italian as open as we can for anyone to read and most importantly share our love with you about the Bel Paese. Every contribution we receive from readers like you, big or small, goes directly into funding our mission.
If you’re able to, please support L’Italo Americano today from as little as $1.