Back in the day, one of our favorite places for a nice affordable meal close by our apartment in central Rome was Taverna Parione. Located on a small side street off tourist-mobbed piazza Navona, despite its location it was the real deal, with excellent food, especially the pizzas and pastas.
But my very favorite part of the meal was the starter we never failed to order: focaccia Genovese, the world-renowned flatbread from Genoa, served with sparkling fresh mozzarella shipped in daily from lower Lazio and velvety prosciutto, sliced fresh to order right off the bone.
(Copyright: Dreamstime)
Taverna Parione (like many places in Rome, if you knew where to look for them) offered simple, genuine and affordable eating of the kind that’s nigh on impossible to find in restaurants in this country, for love or money.
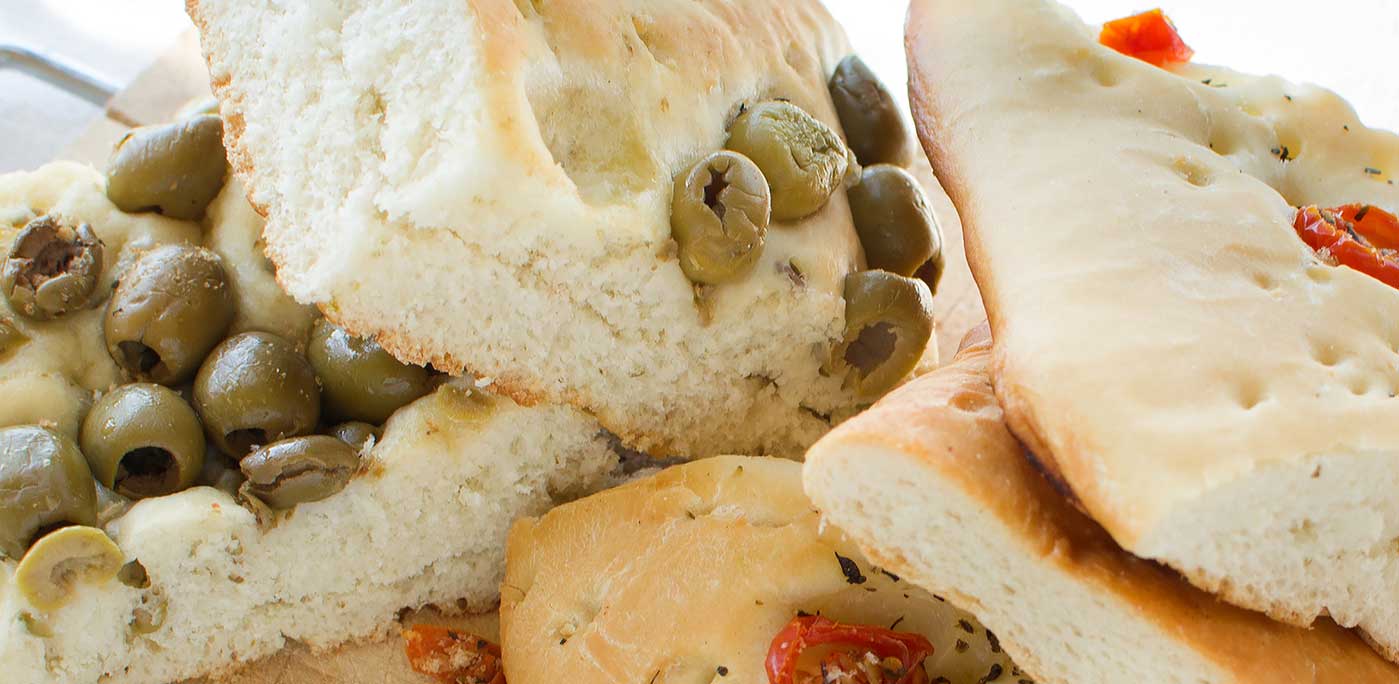
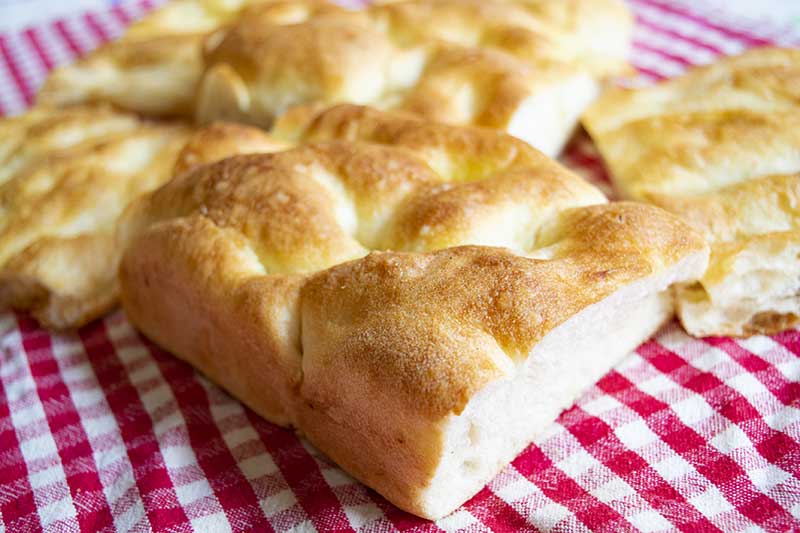
But you can recreate that kind of experience, at home. Focaccia Genovese, or fügassa in local dialect, is not at all hard to make, albeit a bit time-consuming with its multiple risings. Your patience will pay off with a delicious savory snack, crispy on the outside, tender on the inside. And addictively delicious. I’m still amazed something so flavorful can come from just flour, water, salt and oil.
A well made focaccia is delicious on its own, just sprinkled with some coarse salt. But I usually like to enjoy it the way we used to back then, accompanied by sliced prosciutto and fresh mozzarella cheese.
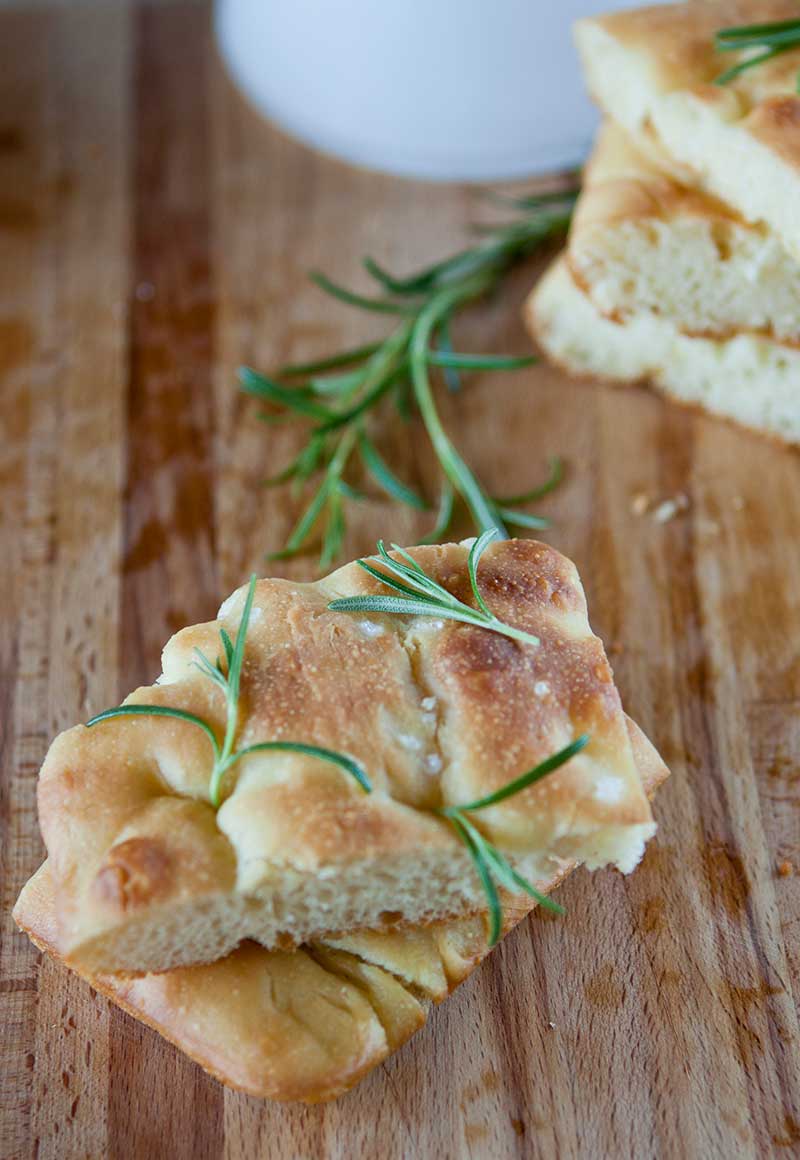
(Copyright: Dreamstime)
In Liguria itself, it is often baked with toppings—rosemary, sliced onion, cherry tomatoes or olives being some of the most common. However you choose to make it, make a large portion. It will disappear quickly.
Ingredients
Makes one tray of focaccia, approximately 9″x13″
- 250ml (1 cup) lukewarm water
- 1 tsp dried yeast
- 300 g (2-1/2 cups) all-purpose flour, or a bit more if needed
- 1 tsp honey
- 1 tbs salt
- 2 tbs olive oil
For finishing the focaccia:
- 2-3 tbs water
- 2-3 tbs olive oil
- Coarse salt
Optional:
- Rosemary leaves
- Thinly sliced onions, moistened with a drizzle of olive oil
- Olives
- Cherry or grape tomatoes
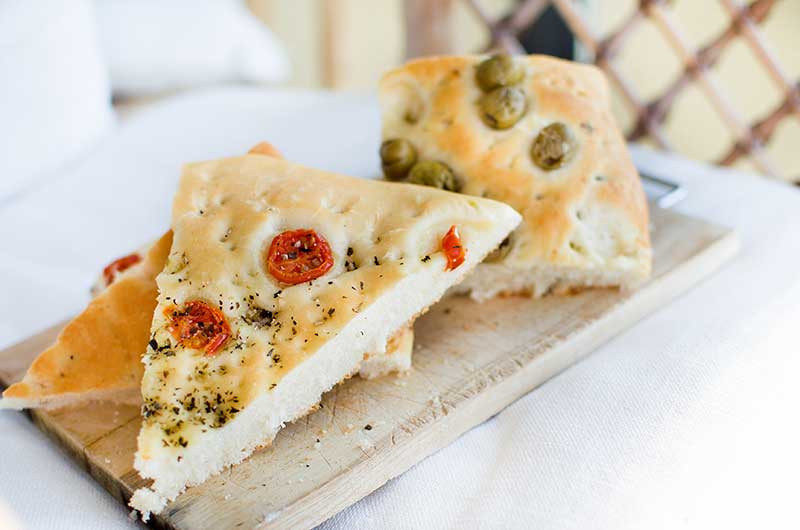
(Copyright: Dreamstime)
Directions
- Whisk the lukewarm water and yeast in the bottom of the bowl of a standing mixer. Let the mixture rest for 5-10 minutes.
- Add one cup of the flour and mix with the dough hook until you have a smooth paste. Then add the salt, honey and olive oil, and finally the rest of the flour.
- Continue mixing with the dough hook until you have a nice, elastic and just slightly sticky ball of dough.
- Slide the dough off the hook and into the mixing bowl. Form a ball and cover the bowl with a towel. Let the dough rest for a good 2 hours (or more) in a warm place until it has doubled in size. (If your kitchen is a bit cool, you can place the bowl inside a turned-off oven).
- Pour a bit of olive oil on a baking sheet. Then scoop the dough out of its bowl onto the baking sheet. Flatten it out into a roughly rectangular shape and turn it over to grease both sides. Cover it with some plastic wrap or wax paper and then a light towel. Let the dough rest in the baking pan for about 20-30 minutes or so, to soften.
- Now spread the dough out with your hands, until it thinly and evenly covers the entire surface of the baking pan.
- Cover the dough again and let it rest in a warm place for a good 45-60 minutes to rise.
- Mix the oil and water in a measuring cup and pour it over the dough. Spread it out over the surface of the dough with the palms of your hands.
- Pressing with the tips of your fingers, create little dimples all over the surface of your focaccia. Sprinkle the dough with coarse salt and, if using, rosemary leaves.
- Bake in a hot (200C/400F) pre-heated oven for 20-30 minutes, until the focaccia is golden brown on top.
- Let the focaccia cool on a baking grid.
- Serve still warm or at room temperature.
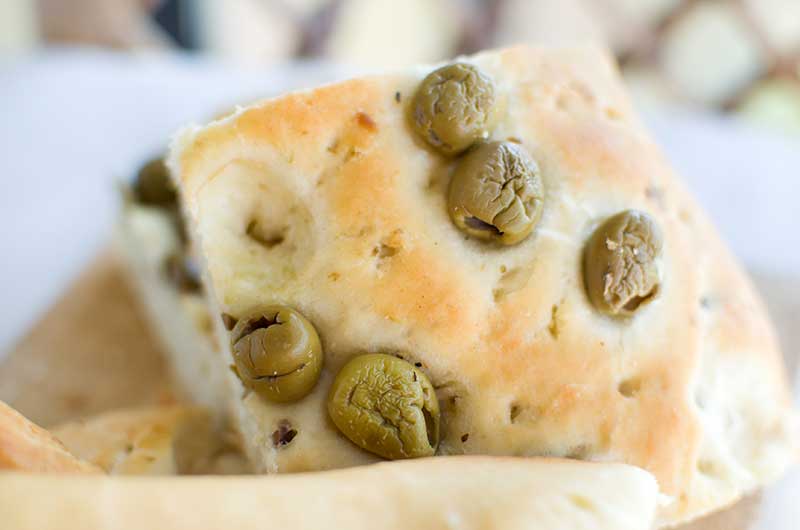
(Copyright: Dreamstime)
Notes on focaccia Genovese
Rising times may vary according to the weather. When the ambient temperature is cooler, your initial rise may take 3 hours rather than 2, in warmer weather, you may find 90 minutes sufficient. Of course, you can always let the dough go a bit longer if you like, no harm done.
In some recipes, you let the dough made with only the one cup of the flour ferment for 2 hours, before adding the rest of the flour and letting it rest another 2 hours. This initial fermented paste is referred to as a biga or “chariot” in Italian, not sure why. A biga does add character to your dough, but whether it’s worth an extra few hours of your time is up to you.
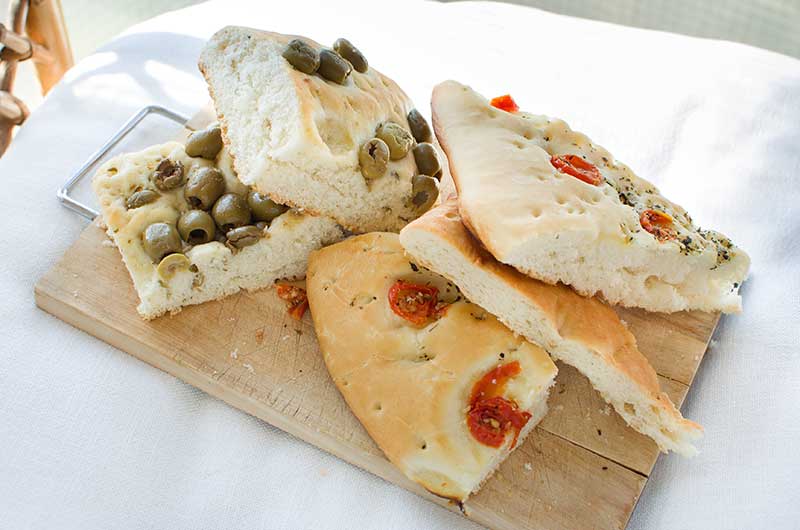
(Copyright: Dreamstime)
The same variability goes for the second and third rises in the baking pan. The second rise, though, is really more of a rest, serving to soften the dough up so it can easily be spread out to cover the whole pan. The third is an actual rise. You’ll want to see the dough rather nicely puffed up, the better to make those dimples, where the oil will puddle, giving your focaccia Genovese its characteristic look and mouth feel.
Also important to that mouth feel: cooling your focaccia Genovese on a baking grid. That will let air circulate above and below, so the bottom crust stays nice and crispy.
Thick or thin?
The thickness of a focaccia can vary, too, but an authentic focaccia genovese should be rather thin, even if it needn’t be quite as thin as my version presented here. So many non-Italian renditions of “focaccia” are more like bread in their thickness. And the most disappointing ones lack the characteristic undulating crispy crust. At that point, you are are no longer dealing with focaccia, it’s just oily bread. You lose the whole charm of the dish: the balance between the crispiness of the crust and the tenderness of the crumb.
Frank is a lawyer with a true passion for cooking and sharing food with the people he loves. He inherited his love for Italian cuisine and culinary tradition from his grandmother, nonna Angelina, to whom he dedicated his culinary blog, Memorie di Angelina: www.memoriediangelina.com
In passato, uno dei nostri posti preferiti per un buon pasto a prezzi accessibili, vicino al nostro appartamento nel centro di Roma, era la Taverna Parione. Situata in una stradina laterale rispetto a piazza Navona, nonostante la sua posizione, era un vero affare con ottimo cibo, specialmente pizze e pasta.
Ma la parte del pasto preferita era l’antipasto che non mancavamo mai di ordinare: focaccia genovese, la famosissima focaccia genovese, servita con mozzarella fresca spedita ogni giorno dal basso Lazio e il vellutato prosciutto, tagliato fresco a fette direttamente dall’osso, su ordinazione.
La Taverna Parione (come molti posti a Roma, se si sa dove cercarli) offriva un’alimentazione semplice, genuina ed economica, come quella che è quasi impossibile trovare nei ristoranti di questo paese, per amore o per soldi.
Ma quel tipo di esperienza si può ricreare a casa. La focaccia genovese, o fügassa nel dialetto locale, non è affatto difficile da realizzare, anche se richiede un po’ di tempo con le sue molteplici lievitazioni. La vostra pazienza vi ripagherà con un delizioso spuntino salato, croccante all’esterno, tenero all’interno. Vi porterà a una deliziosa dipendenza. Sono ancora stupito di come qualcosa di così saporito possa venire fuori solo da farina, acqua, sale e olio.
Una focaccia ben fatta è deliziosa da sola, appena cosparsa di sale grosso. Ma di solito mi piace gustarla come una volta, accompagnata da prosciutto a fette e mozzarella fresca.
In Liguria, spesso viene cotta al forno con farciture: rosmarino, cipolla affettata, pomodorini o olive sono tra le farciture più comuni. In qualsiasi modo la si scelga, prendetene una grossa porzione. Scomparirà rapidamente.
Ingredienti
Per un vassoio di focaccia di circa 9 x 13.
- 250 ml (1 tazza) di acqua tiepida
- 1 cucchiaino di lievito secco
- 300 g (2-1/2 tazze) di farina multiuso, o un po’ di più se necessario
- 1 cucchiaino di miele
- 1 cucchiaio di sale
- 2 cucchiai di olio d’oliva
Per condire la focaccia:
- 2-3 cucchiai di acqua
- 2-3 cucchiai di olio d’oliva
- Sale grosso
Facoltativo:
- Foglie di rosmarino
- Cipolle tagliate a fette sottili, inumidite con un filo d’olio d’oliva
- Olive
- Pomodorini ciliegia o uva
Istruzioni
- Mescolare l’acqua tiepida e il lievito sul fondo della ciotola di un mixer. Lasciare riposare la miscela per 5-10 minuti.
- Aggiungere una tazza di farina e mescolare con lo strumento per l’impasto fino ad ottenere una pasta liscia. Quindi aggiungere il sale, il miele e l’olio d’oliva, e infine il resto della farina.
- Continuare a mescolare con lo strumento per l’impasto fino ad ottenere una palla di pasta bella, elastica e leggermente appiccicosa.
- Far scivolar via la pasta dallo strumento per l’impasto nella ciotola di miscelazione. Formare una palla e coprire la ciotola con un asciugamano. Lasciate riposare la pasta per 2 ore (o di più) in un luogo caldo fino a quando non sarà raddoppiata. (Se la vostra cucina è un po’ fresca, è possibile posizionare la ciotola all’interno di un forno spento).
- Versare un po’ d’olio d’oliva su una teglia da forno. Poi raccogliere l’impasto dalla sua ciotola e metterlo sulla teglia da forno. Appiattire in una forma approssimativamente rettangolare e girare per ingrassare entrambi i lati. Coprire con un po’ di plastica o carta cerata e poi un asciugamano leggero. Lasciate riposare l’impasto nella teglia per circa 20-30 minuti, per farla ammorbidire.
- Ora stendete l’impasto con le mani, fino a quando non coprirà in modo sottile e uniforme l’intera superficie della teglia.
- Coprire nuovamente la pasta e lasciarla riposare in un luogo caldo per 45-60 minuti per farla lievitare.
- Mescolare l’olio e l’acqua in un misurino e versarlo sulla pasta. Stendere la superficie dell’impasto con i palmi delle mani.
- Premendo con la punta delle dita, create piccole fossette su tutta la superficie della focaccia. Cospargete l’impasto con sale grosso e, se le usate, le foglie di rosmarino.
- Cuocere in forno caldo (200C/400F) preriscaldato per 20-30 minuti, fino a quando la focaccia sarà dorata sopra.
- Lasciare raffreddare la focaccia su una griglia da forno.
- Servire ancora calda o a temperatura ambiente.
Note sulla focaccia Genovese
I tempi di lievitazione possono variare a seconda del clima. Quando la temperatura ambiente è più fredda, l’aumento iniziale può richiedere 3 ore invece che 2, con clima più caldo, possono bastare 90 minuti. Naturalmente, si può sempre lasciare che l’impasto lieviti un po’ più a lungo, senza alcun danno.
In alcune ricette, si lascia lievitare la pasta fatta con una sola tazza di farina per 2 ore, prima di aggiungere il resto della farina e lasciarla riposare per altre 2 ore. Questa pasta fermentata iniziale viene chiamata biga ovvero carro, ma non so perché. Una biga aggiunge carattere alla vostra pasta, ma se meriti o meno qualche ora in più del vostro tempo dipende da voi.
La stessa variabilità vale per la seconda e la terza lievitazione in teglia. La seconda lievitazione, però, è in realtà più un riposo, che serve ad ammorbidire la pasta in modo che possa essere facilmente stesa a coprire l’intera teglia. La terza è una vera e propria lievitazione. Avrete voglia di vedere che la pasta sia piuttosto ben gonfia: si formeranno meglio quelle fossette dove l’olio si addensa, dando alla vostra focaccia genovese il suo caratteristico aspetto e il suo sapore.
Un altro aspetto importante per quella sensazione in bocca: fate raffreddare la focaccia genovese su una griglia da forno. In questo modo l’aria circolerà sopra e sotto, così che la crosta inferiore rimarrà bella e croccante.
Spessa o sottile?
Anche lo spessore di una focaccia può variare, ma una vera focaccia genovese dovrebbe essere piuttosto sottile, anche se non deve essere così sottile come la mia versione qui presentata. Tante versioni non italiane della focaccia sono più simili al pane nel loro spessore. Alle versioni più deludenti invece, manca la caratteristica crosta ondulata e croccante. A quel punto non si ha più a che fare con la focaccia, è solo pane oleoso. Si perde tutto il fascino del piatto: l’equilibrio tra la croccantezza della crosta e la tenerezza della mollica.


