It’s coming up to Carnival time and bakeries in Italy have trays of ‘chiacchiere’ in their windows. Think a pastry that is thin, crispy, fried and covered in icing sugar…. I knew that would get your attention! We would have these when I was growing up in Australia only when my Calabrese Nonna Concetta would make them. I’ve always called them ‘Crostoli’, and their name changes throughout Italy. The recipe remains more or less the same, the only real difference I noticed was that some people don’t add butter or fat to the recipe.
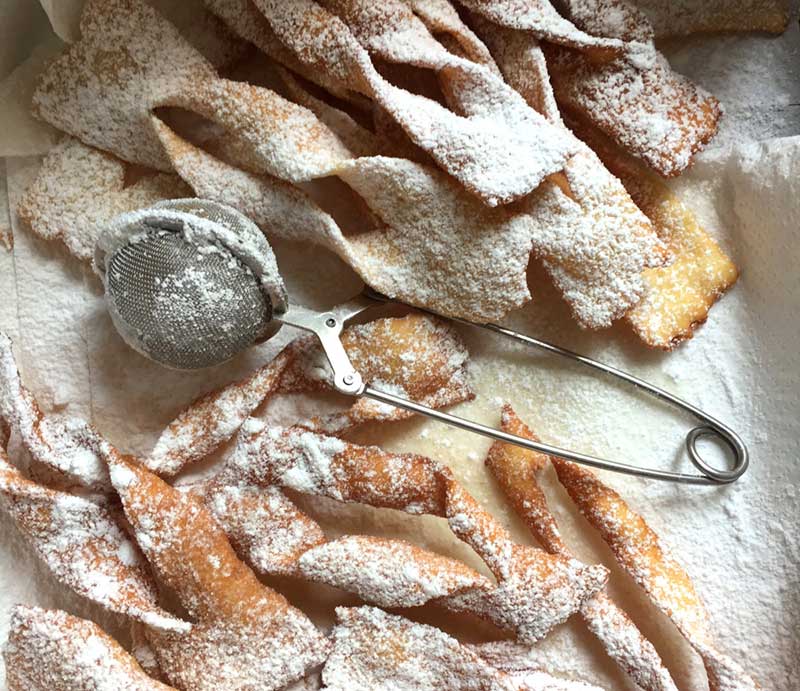
Whatever you prefer to call them, there is no denying that they are addictively delicious, and impossible to eat just one © Toni Brancatisano
I recently asked on Facebook what people called these where they were from in Italy, and although Chiacchiere was the most common name, they are also known in various regions of Italy as: Crostoli – Cenci – Frappe – Sfrappe – Sfrappole – Bugie – Stracci – Fiocchi – Cencetti – Galani – Sprelle – Meraviglias – Teste di Turchi – Intrigoni – Monachelle – Straccetti – Nacatoli – Grostoli – Gali. A couple of these are dialect, but I found it fascinating that one traditional sweet pastry can be called so many different names.
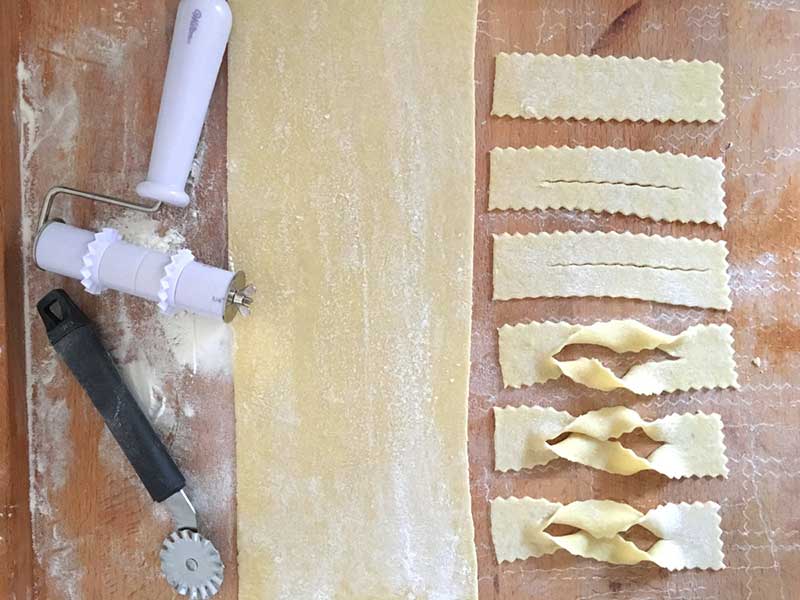
It is surprisingly easy to make chiacchiere! © Toni Brancatisano
Whatever you prefer to call them, there is no denying that they are addictively delicious, and impossible to eat just one. They are not at all difficult to make, although a pasta machine will make your life a little easier. This recipe comes the closest to resembling the crostoli my Nonna would make, and tasting them again invoked nostalgic childhood memories.
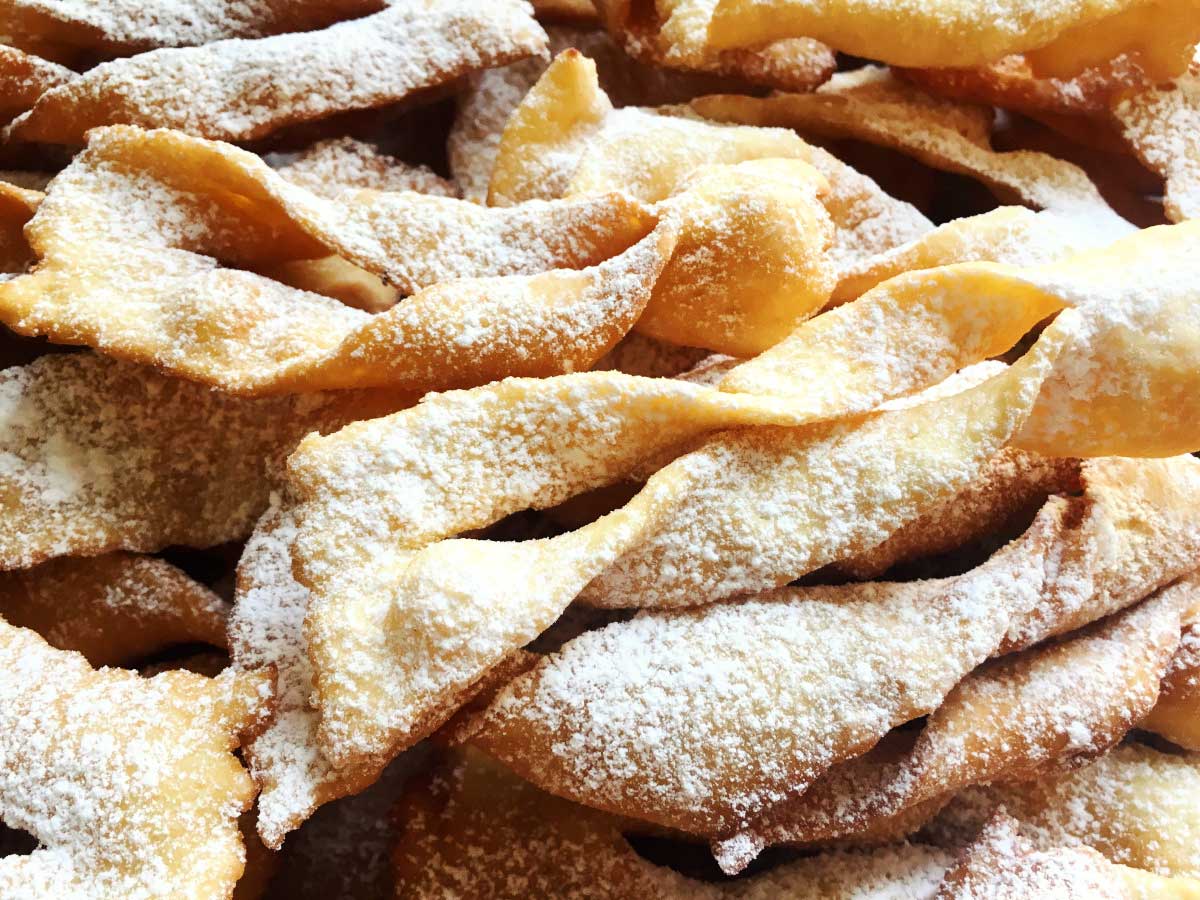
Chiacchiere are light and crispy, even if they are deep fried! © Toni Brancatisano
CHIACCHIERE
•10 1/2 oz plain flour
•7 oz self-rising flour
*(Alternatively, you can use 17.5 oz plain flour and add 0.28 oz of powdered yeast)
•3 whole eggs + 1 egg yolk (lightly beaten)
•2 oz butter, room temperature
•2 tablespoons grappa
•pinch salt
•3 oz sugar
•zest of 1 lemon
•sunflower or peanut oil for frying
•icing sugar
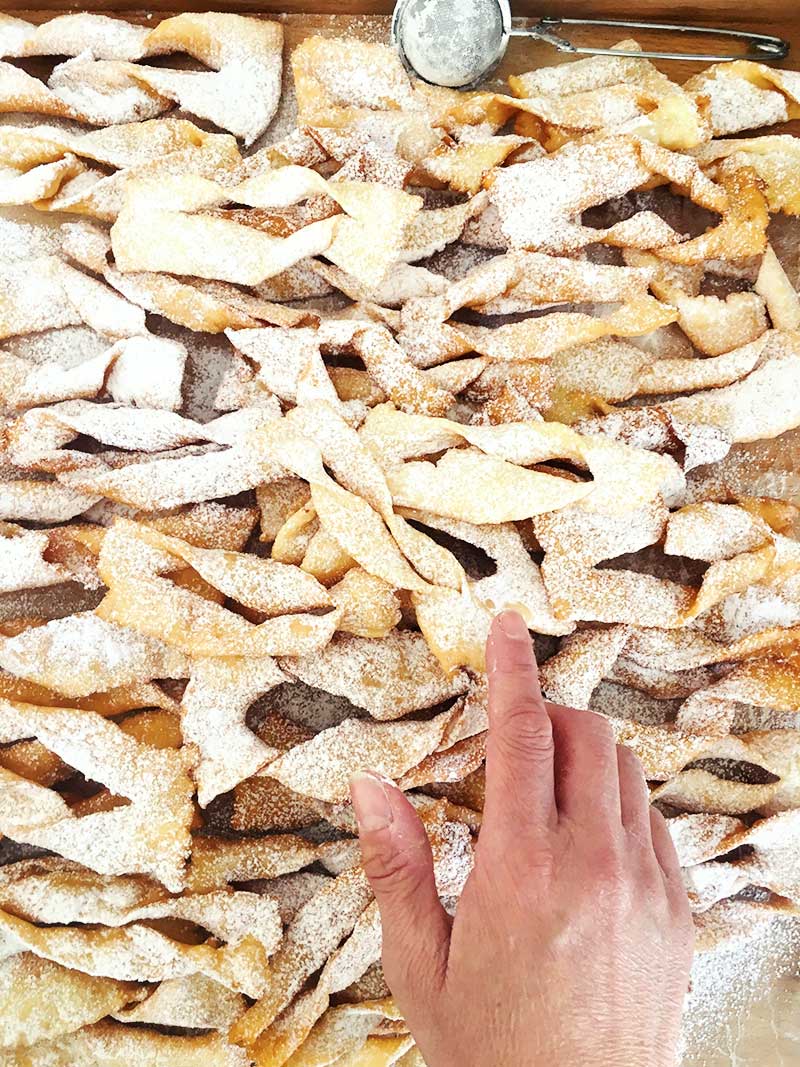
Whatever you prefer to call them, there is no denying that they are addictively delicious, and impossible to eat just one © Toni Brancatisano
Directions
1. In an electric mixer, add sifted flour, sugar, eggs, grappa, salt and lemon zest and mix until well combined. Using a dough hook, add the butter, and mix until a dough forms.
2. Turn dough onto a lightly floured board and knead for about 10 minutes or until the dough is smooth. You may have to add a little water if the dough seems crumbly or dry. Roll into a ball, cover in plastic kitchen wrap and let rest for 30 minutes at room temperature.
3. Divide dough into 4. Keep unused dough wrapped in plastic wrap to prevent it from drying out. Knead dough and roll out with the use of a rolling pin. The next part is like making pasta. Flatten the end of the piece of dough with the palm of your hand, and using a pasta machine pass it through once on the largest setting. (My pasta machine is the attachment for my Kitchen Aid, and the largest gap is No. 1.)
4. Fold the dough in 3 and pass it through No. 1 another time. Repeat passing it through the pasta machine, increasing the number each time, and finish at No. 5. (If you don’t own a pasta machine, you can roll out the pasta by hand, just ensure your dough is very thin.)
5. Using a zig-zag pastry cutter, cut the pastry into strips. Cut a small line in the middle of each strip, and then fold one end in and under through the middle space. (see photos). Some people don’t do this. and you can choose to cook them without twisting the central part if you like.
6. Leave prepared raw chiacchiere to rest for a couple of minutes and heat oil in a saucepan or deep frying pan to a temperature of about 180°C. (Test oil with a scrap of dough).
7. Work quickly, add 3 chiacchiere, turn them over, and remove draining on kitchen paper. Repeat until you have cooked them all, and continue until you have used all remaining dough.
8. Serve sprinkled with icing sugar. Store in an airtight container.
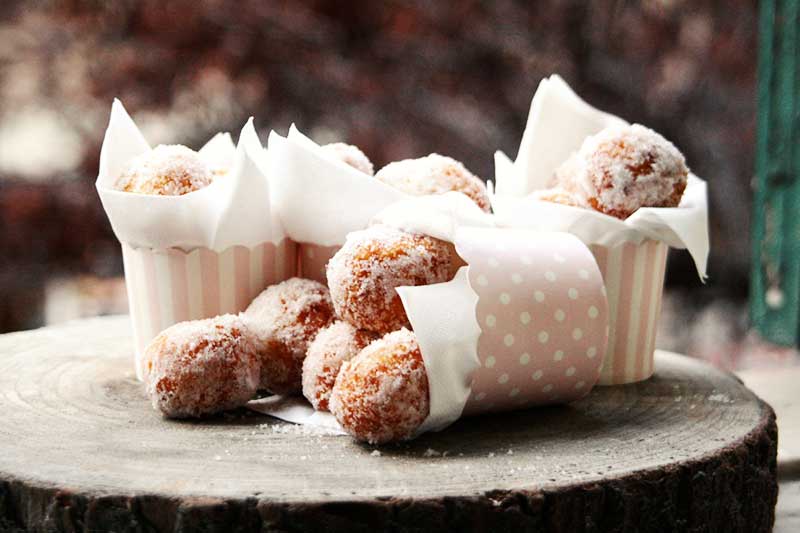
This recipe is easy to follow, just make sure you take your time cooking the rice © Toni Brancatisano
FRITTELLE DI RISO
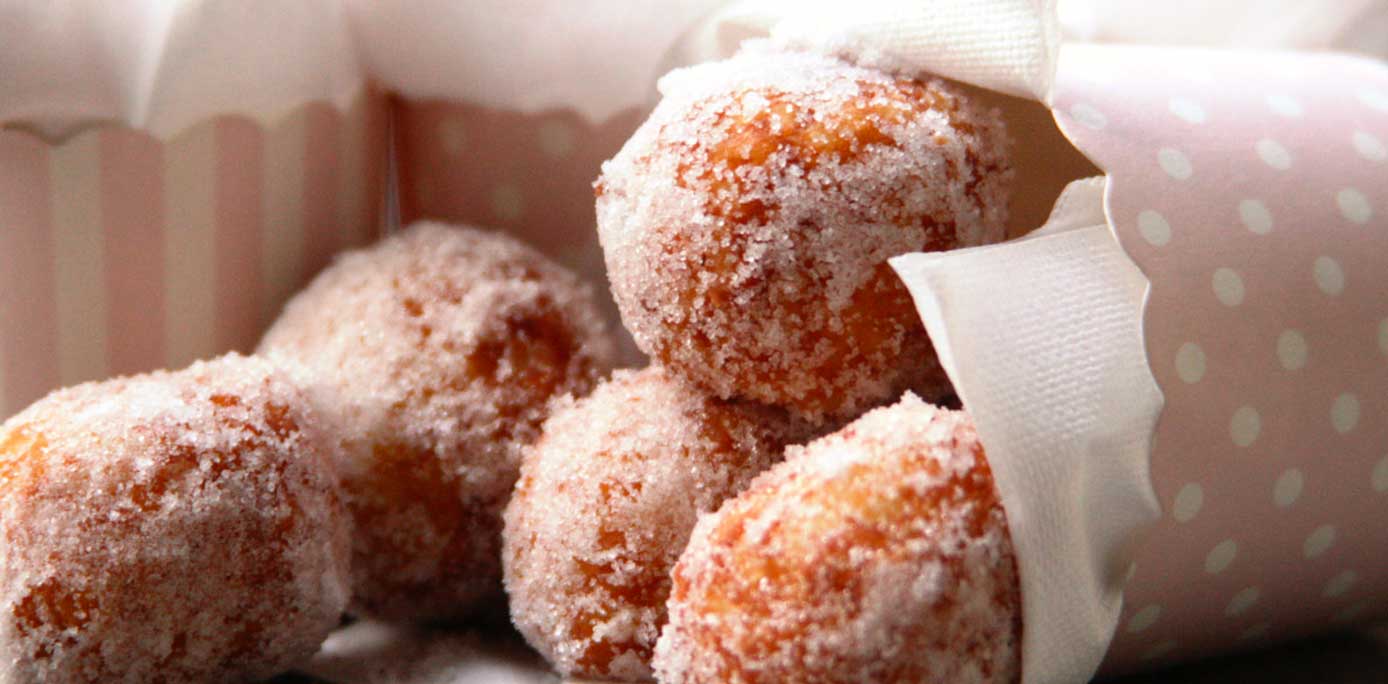
Continuing with Italian carnival traditions, this recipe is a classic, especially in Tuscany. Think of that delicious rice pudding you would have as a child, and imagine it rolled into balls, fried, and covered in sugar. That’s the best description I have to describe these delicious treats which I would also class as an italian ‘comfort food’. When I used to live in Pietrasanta, a naughty breakfast during carnival time would be hot ‘frittelle di riso’ with my cappuccino!
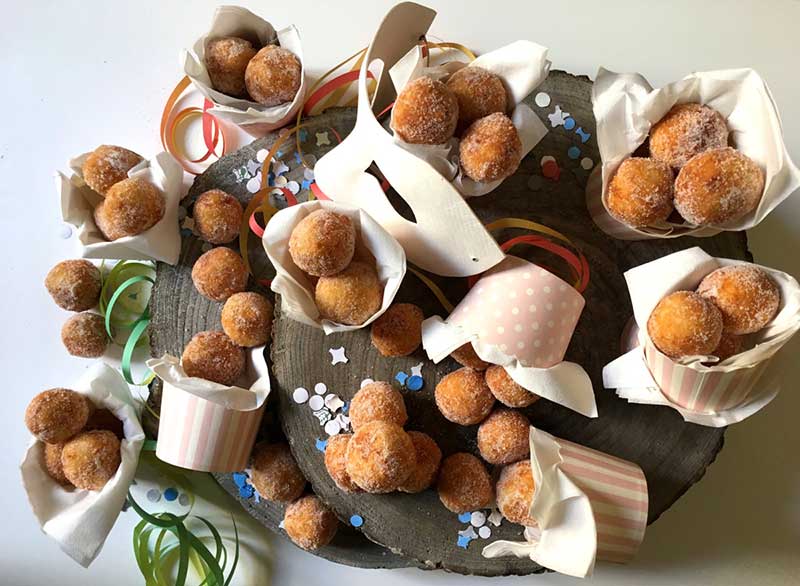
These delicious fritters are typical of Tuscany © Toni Brancatisano
This recipe is easy to follow, just make sure you take your time cooking the rice. The rice used for this recipe in Italian is called Riso Originario. Its characteristics include having a grain that is small, round, with a high starch content. It is best for sushi, soups and especially for desserts. You can use any white starchy rice though, and the rice ideally needs to be cooked the night before you plan to make your frittelle. Not everybody rolls the rice mixture into flour before frying them, but it helps keep them together and especially helps have perfect balls. (Note that in most places, frittelle aren’t all perfect and uniform in size or shape).
FRITTELLE DI RISO
•7 oz white rice (originario)
•13.5 floz whole milk
•13.5 floz water
•3.5 oz sugar
•zest of 1 lemon
•2 oz butter
•2 eggs
•pinch salt
•3 oz flour (3/4 Cup) + extra
•oil for frying
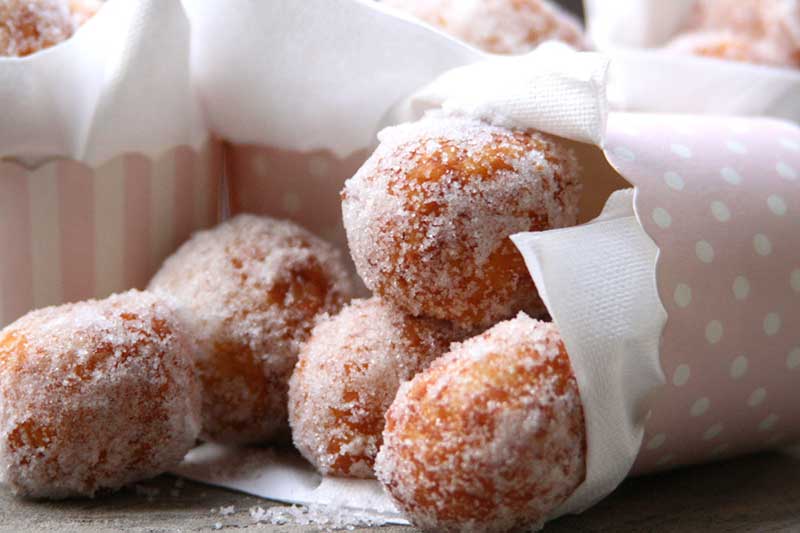
If you want, you can add some cinnamon to the sugar, too! © Toni Brancatisano
DIRECTIONS
1. In a heavy saucepan, add the rice, milk, water, salt and lemon zest. Slowly bring to the boil, stirring occasionally. Once rice is boiling, lower heat and allow to simmer.
2. Add sugar and butter, and continue to simmer until rice has absorbed all liquid. (Stir occasionally to avoid rice sticking to bottom of saucepan.) Leave to cool completely, cover and place overnight in refrigerator.
3. Add eggs, one at a time, and flour. Stir through with a spoon, until both eggs and flour are incorporated evenly into rice mixture.
4. Using a tablespoon measure, remove rice and drop into a bowl of flour. Roll rice into balls and put aside.
5. Heat oil and test with a little rice to see if it has arrived at an appropriate temperature for frying. Drop rice balls into the oil, and turn frequently to ensure they brown all over. Remove when golden, and allow to drain on kitchen paper.
6. Roll in sugar and serve while still warm. You can add a pinch of cinnamon to the sugar if you like.
*Alternate recipe would be to add sultanas (previously soaked in port) or candied peel to rice mixture once it’s cooked.
Il Carnevale sta per arrivare e, in Italia, tutte le pasticcerie iniziano ad avere grandi vassoi di chiacchiere in vetrina. Si tratta di un dolce molto sottile, croccante, fritto e coperto di zucchero a velo…Sapevo che avrebbe attirato la vostra attenzione! Quando ero piccola, in Australia, le mangiavamo solo quando nostra nonna Concetta, che era Calabrese, le preparava. Le ho sempre chiamate crostoli, e il loro nome cambia a seconda della zona d’Italia. La ricetta però rimane più o meno la stessa: l’unica cosa che ho notato è che alcune persone non aggiungono burro, né altri tipi di grasso all’impasto.
Recentemente, ho chiesto su Facebook come questi dolci vengano chiamati nella vaire zone d’Italia e, anche se chiacchiere rimane sicuramente il nome più comune, sono anche conosciute come: crostoli, cenci, frappe, sfrappe, sfrappole, bugie, stracci, fiocchi, cencetti, galani, sprelle, meraviglie, teste di Turchi, intrigoni, monachelle, straccetti, nacatoli, grostoli, gali. Un paio di questi sono in dialetto, ma trovo affascinante che un unico dolce possa avere così tanti nomi.
Comunque voi preferiate chiamarle, non si può certamente negare che siano incredibilmente buone e che “una tiri l’altra:” è impossibile mangiarne solo una. Non sono difficili da preparare, anche se una macchina per fare la pasta vi renderà certamente la vita più facile.
La ricetta che vi propongo è la più vicina ai crostoli di mia nonna e mangiarle ha riportato alla mente molte bellissime memorie della mia infanzia.
Chiacchiere
• 300 gr farina
• 200 gr farina con lievito aggiunto
*Alternativamente, potete usare 500 gr di farina e aggiungere 8 gr di lievito in polvere.
• 3 uova intere + 1 tuorlo (leggermente sbattuti)
• 50 gr di burro, a temperatura ambiente
• 2 cucchiai di grappa
• un pizzico di sale
• 80 gr di zucchero
• la scorza di un limone
• olio di girasole o arachidi per friggere
• zucchero a velo
ISTRUZIONI
1. In una planetaria, aggiungete la farina setacciata, lo zucchero, le uova, la grappa, il sale e la scorza di limone, mescolando fino a quando tutti gli ingredienti non sono ben amalgamati. Usando un gancio da pasta per il pane, aggiungete il burro, e mescolate fino a quando il vostro impasto non sarà omogeneo.
2. Ponete l’impasto su un piano infarinato e impastate per almeno 10 minuti, o fino a che non otterrete un impasto liscio e morbido. Potreste avere bisogno di aggiungere un poco di acqua, in caso vi sembri troppo secco. Formate una palla, copritela con del cellophan e lasciate riposare per 30 minuti a temperatura ambiente.
3. Una volta passata mezz’ora, dividete l’impasto in 4, facendo attenzione a mantenere quello che non state lavorando nel cellophan, per evitare che si asciughi troppo. Impastatelo e stendetelo con un mattarello. Il prossimo passo è identico a quello da fare quando si fa la pasta fatta in casa. Con il palmo della mano, schiacciate il fondo del vostro impasto e, usando una macchina per fare la pasta, passatecelo attraverso una volta, usando la misura più grande (la mia macchina per la pasta è un accessorio della planetaria Kitchen Aid, e il setting più grande è il no.1).
4. Piegate l’impasto in 3 e ripassatelo attraverso il no.1 un’altra volta. Continuate con lo stesso procedimento, aumentando il numero ogni volta, finendo con un no.5. Se non avete una macchina per fare la pasta, potete tranquillamente usare un mattarello, ma attenti: l’impasto deve risultare veramente sottile.
5. Prendete una rotella seghettata e tagliate la sfoglia ottenuta in listarelle. Incidete una piccola linea nel mezzo di ogni striscia, poi piegatene un’estremità all’interno e sotto il taglio (vedi foto). In molti saltano questo passaggio e voi potete anche scegliere di farle friggere senza attorcigliarne il centro.
6. Lasciate le chiacchiere crude a riposare per un paio di minuti e scaldate l’olio in una pentola o in una friggitrice, portandolo ad una temperatura di 180 gradi Celsius (356 F). Controllate la temperatura dell’olio con un pezzetto di impasto.
7. Fate friggere velocemente: aggiungete 3 chiacchiere all’olio, giratele, toglietele e scolatele su un pezzo di carta da cucina. Continuate così fino a quando non avrete finito di far cuocere tutto l’impasto.
8. Servite ricoperte di zucchero a velo.
9. Conservate in un contenitore sottovuoto.
Frittelle di Riso
Ecco un’altra ricetta tipica della tradizione carnevalesca, specialmente in Toscana. Ricordate quel meraviglioso riso dolce che mangiavate da bambini? Bene, immaginatelo a forma di pallina, fritto e ricoperto di zucchero. Questa è la descrizione migliore che mi venga in mente per questi dolcetti deliziosi, che secondo me sono anche un buon esempio di “comfort food” all’Italiana. Quando vivevo a Pietrasanta, se mi andava una colazione un po’ malandrina, sceglievo frittelle di riso calde e cappuccino!
Questa ricetta è molto semplice, assicuratevi solo di cuocere il riso come si deve. Il riso usato in Italia per queste frittelle è il riso originario. Le sue caratteristiche includono l’avere un chicco molto piccolo, rotondo e ricco in amidi. E’ molto indicato per sushi, zuppe e soprattutto dolci. Potete comunque usare ogni tipo di riso ricco in amido. Idealmente, dovrebbe essere cucinato la sera prima di fare le frittelle. Non tutti passano il riso nella farina prima di cuocerle, ma questo aiuta a renderle compatte e, soprattutto, fa sì che abbiate delle perfette palline di riso. (C’è comunque da notare che, nella maggior parte dei luoghi, le frittelle non sono mai tutte uguali, nè in dimensione, né in forma).
Frittelle di riso
• 200 gr riso originario
• 400 ml latte intero
• 400 ml acqua
• 100 gr zucchero
• buccia di un limone
• 50 gr di burro
• 2 uova
• un pizzico di sale
• 90 gr di farina (3/4 di una tazza) + extra
• olio per friggere
ISTRUZIONI
1. In una pentola, unite il riso, il latte, l’acqua, il sale e la buccia di limone. Portate ad ebollizione lentamente, mescolando di tanto in tanto. Una volta che il riso bolle, abbassate la fiamma e lasciate cuocere.
2. Aggiungete lo zucchero e il burro, continuando a cuocere a fuoco lento fino a che il riso non abbia assorbito completamente tutti i liquidi. (Rimescolate ogni tanto, per evitare che si attacchi al fondo della pentola). Una volta cotto, lasciatelo raffreddare completamente e mettetelo nel frigorifero per la notte.
3. Aggiungete quindi le uova una alla volta e la farina. Mescolate con un cucchiaio, fino a che sia la farina che le uova non saranno ben amalgamate con il riso.
4. Usando un cucchiaio come misura, lasciate cadere il di riso in una ciotola piena di farina e giratele fino a che non diventano palline.
5. Scaldate l’olio, controllandone la temperatura con un poco di riso, per vedere se è caldo abbastanza per friggere. Mettete le palline di riso nell’olio, girandole frequentemente, per assicurarsi che diventino dorate dappertutto. Quando sono, appunto, ben dorate, rimuovetele dall’olio e scolatele su della carta da cucina.
6. Ricopritele di zucchero e servitele mentre sono ancora calde. Se volete, potete aggiungere un pizzico di cannella nello zucchero.
*Una ricetta alternativa potrebbe vedere l’aggiunta al riso di uvetta lasciata ad ammorbidirsi nel Porto, oppure di scorze di frutta candita.


